super noob here. i am trying to build my first agent from the ground up (instead of copying and tweaking Nate’s ) and i am running into a simple issue right off the bat. i am starting with a manual trigger and i cannot for the life of me find the “Add Parameter” button/function. i have been at this for an hour logging in, logging out, updating version, over and over and still no Add Parameter. i can even paste from Grok into the canvas like normal.
my project is to create a demo for a customer that allows them to pick a city or zip code and a business type (84111, mechanic) and then have the agent scrape google maps and provide them a csv list of matches. then i want it to enrich the data with emails for owners or decision makers and send off drip email campaigns.
i am using grok to “teach me” the steps by having it set this up as a learning exercise that will yield a product when i am done. the initial instructions state:
Goal: Configure the Manual Trigger node to accept region (e.g., “Anchorage, AK”) and type (e.g., “auto repair”) as inputs, preparing for Task 1 of your learning plan.
Time: 15-20 minutes.
Steps:
Access n8n Cloud:
Log in to cloud.n8n.io. Ensure your free or paid plan is active (free tier works for this).
Create New Workflow:
Click “New Workflow” in the dashboard.
Name it: “Payroc Lead Gen Agent”.
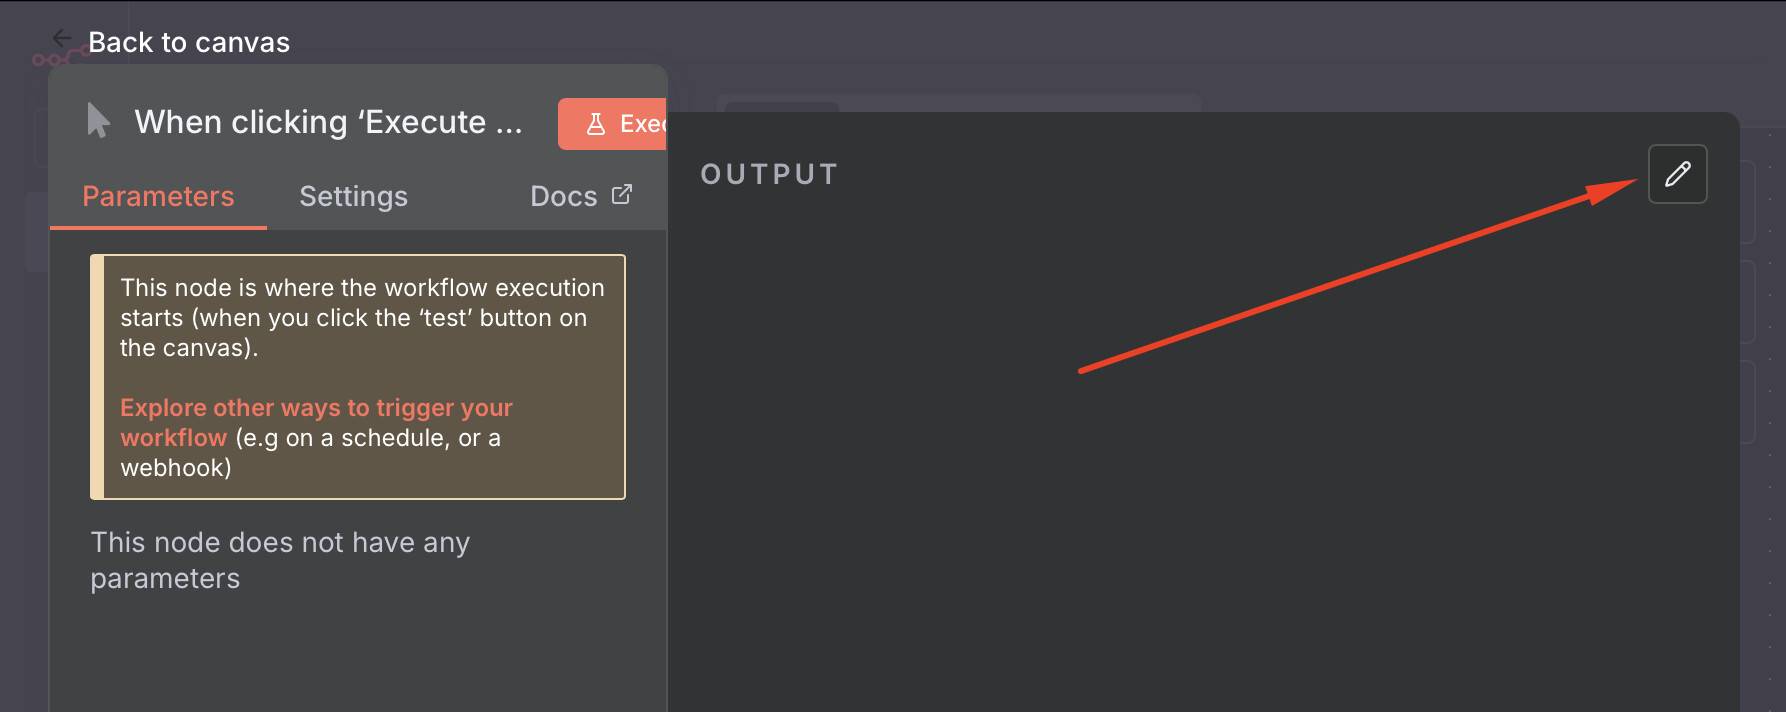
Add Manual Trigger Node:
Drag the Manual Trigger node from the left sidebar (under “Trigger” category) to the canvas.
This node runs when you click “Execute Workflow” in testing mode.
Set Input Parameters:
Click the Manual Trigger node to open settings.
In the “Parameters” section, click “Add Parameter.”
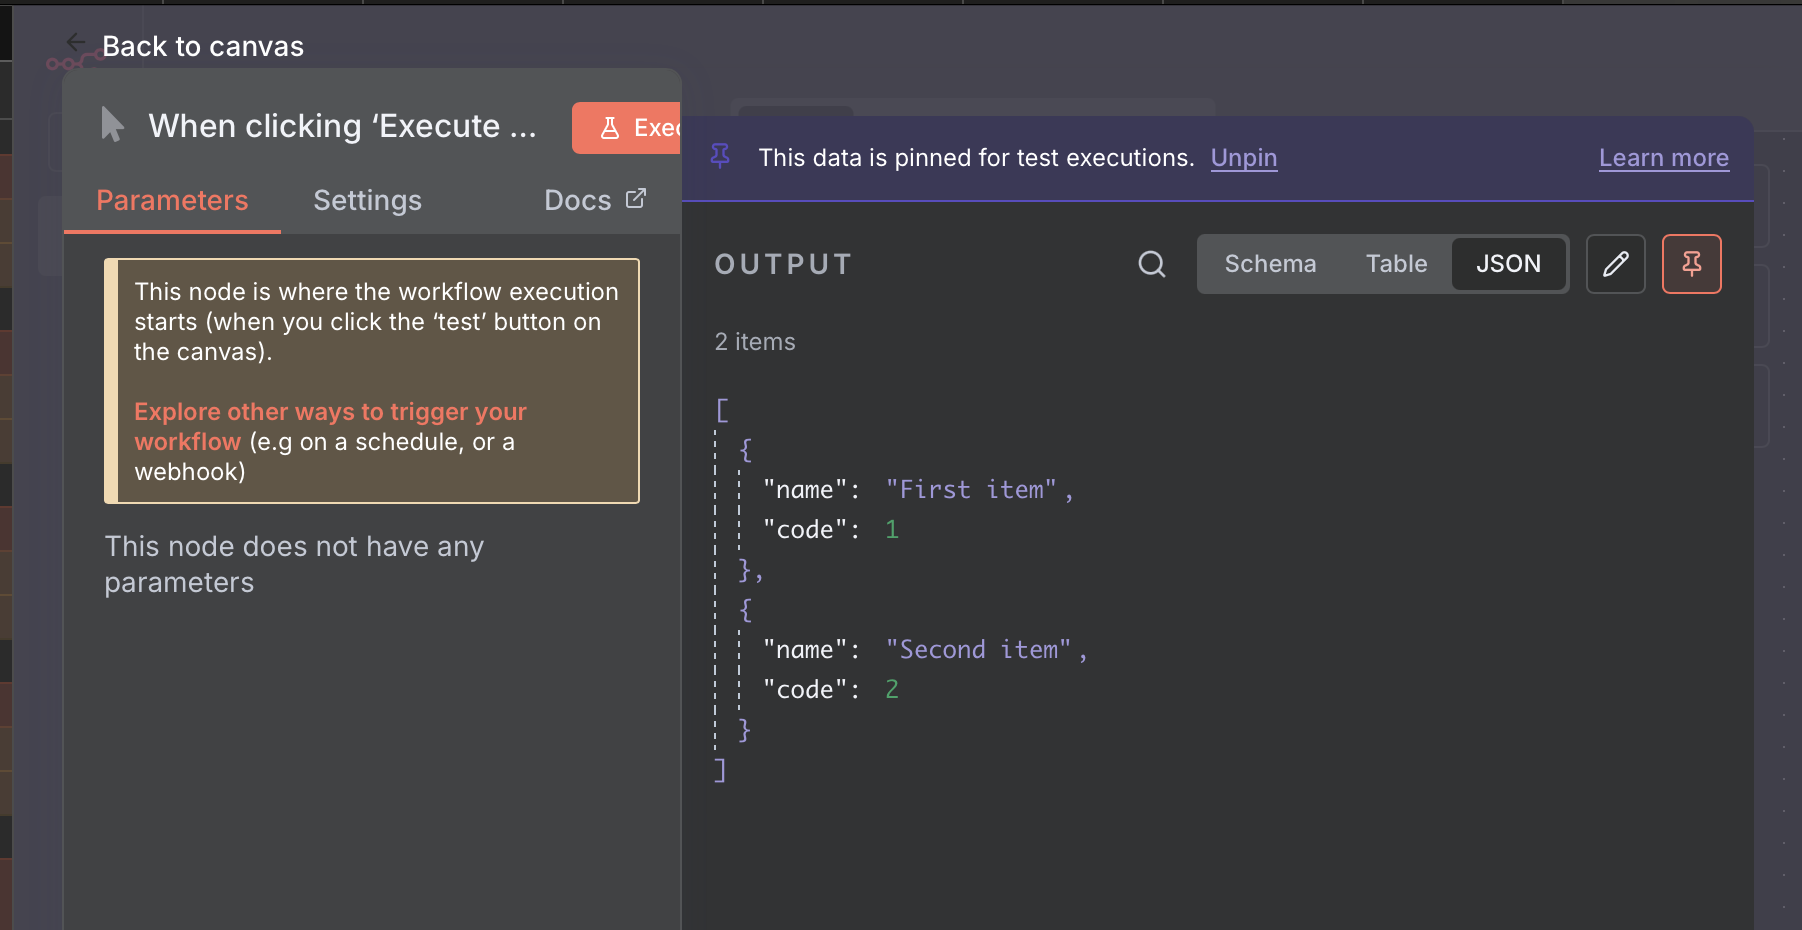
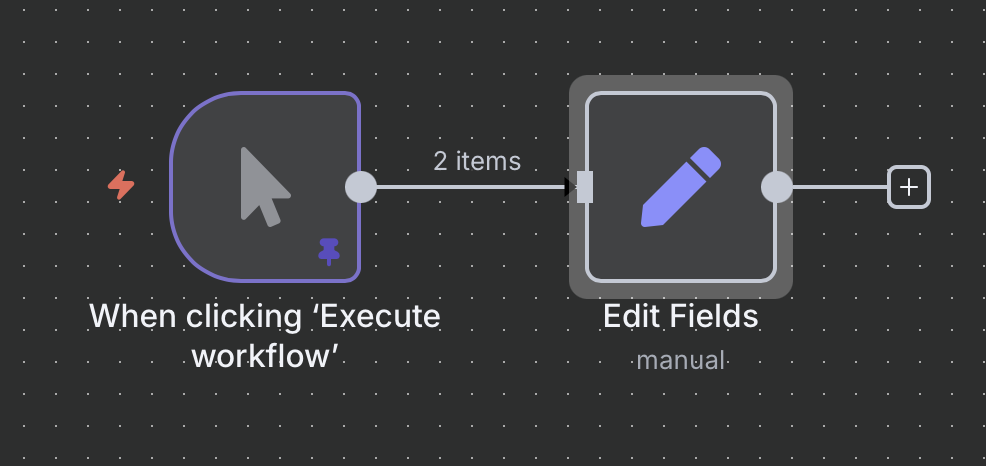
Dont trust instructions from any LLM. They just dont have enough information on n8n workflows and will often lead you down the wrong path. So based on my previous response, you can set your “starting dummy data” by setting the json in the manual step. PS, you’ll probably one day want to trigger this workflow from either a webhook or schedulur so I would suggest using a set node for now.