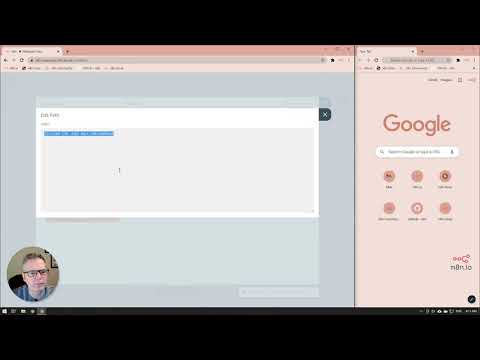
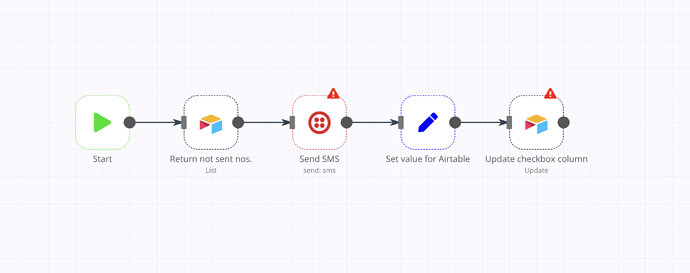
I’m trying to create something similar to what Harshil posted in this tutorial, a workflow that allows Twilio to send a daily SMS to the list of phone numbers in my Airtable.
However, I want the workflow to trigger when someone text my Twilio # with the word “register.” Then, that # will be saved into my Airtable and that person will receive a reply “you are now registered.” The next day, that person will begin receiving the messages I have set up in my Airtable starting with message #1, then on day 2-message #2 and so on. This workflow will end when this person receives the last message in my Airtable list. When a new person text the word “register” to my Twilio #, this same workflow will trigger again.
What I need help with:
-
I know I’ll need to include webhook trigger and I found this tutorial but I really need a step-by-step walkthrough with screenshots or video if possible.
-
I have a Twilio account and bought a phone number that can receive and send SMS. I have two Airtable base, one to store phone numbers and one with all the messages I want to send to people. I’m not sure if I only need one base with different tables or if I actually need two different bases.
Any help will be appreciated. Thanks.
Hi @Ann_Lopez, welcome to the community 
I don’t have access to a Twilio account able to receive SMS, but from looking at their documentation it doesn’t sound too complicated:
For Twilio phone numbers, you can set the webhook URL for inbound voice calls, SMS messages, or inbound faxes through the Twilio Console.
But you might want to reach out to their support and/or community to get assistance with this.
For the n8n part of things, on our YouTube channel you can also find a short video series on how to create a webhook and work with the data it receives:
Once you have the information from the webhook available in n8n, you can take a look at this video on our channel showing how to integrate Airtable (and other services):
As for the amount of Airtable bases, it would be up to you if you have one base with two tables or the other way round. Since the data is related I’d probably go with one base/two tables but there is nothing restricting you from doing it any other way.
As for a general understanding, you might also want to take a look at our beginner’s course which can be tremendously helpful in getting the hang of n8n. You even get a certificate at the end 
Hope this provides some useful starting points for you. Let us know if you hit any blockers or have any questions along the way!
Hey @Ann_Lopez!
I went through the Twilio documentation and learned that you need to configure the Webhook URL in the Twilio console.
Below are the steps that might help (note: I don’t have a number to test it out, but you should still be able to successfully configure and build your workflow)
- In n8n, add a Webhook node and change the HTTP Method to
POST.
- Since we are building the workflow, copy the Test URL.
- Go to your Twilio Number Console.
- Under the Messaging section, paste the Test URL in the field under the A Message Comes In field.
- In n8n, execute the workflow and from your phone send a reply back to your Twilio number. You should see the response in the Webhook node.
You can find more information about configuring the webhook in Twilio here: How to Receive and Reply to SMS and MMS Messages in Node.js | Twilio
I hope this helps with your first question 
Thanks @harshil1712! I was able to set up the webhook in Twilio and n8n using the Test URL. I’m assuming I need to update that to Production URL when I’m ready?
Can you tell me what I need to do next with Airtable? You mentioned I should set up a column with checkbox field and use the filter by formula option so the phone numbers will not get duplicate messages?
Hey @Ann_Lopez,
Yes. Let me explain the process
- The Airtable table can have columns of the type checkbox. After sending a message you should update the relevant column. For example, you want to send 3 separate messages. In the table, you can have 3 columns of checkbox type. After message #1 is sent you update column #1, and similarly for other messages.
- Now, when fetching the list from Airtable you can use this formula:
{Column NAME}=BLANK(). This formula will return all the numbers that have not yet received the message.
I hope the below illustration makes it more clear:


